This article introduce how to setup the environment on Azure. Service Fabric offers Microservices and containerized architecture on Microsoft Azure, and it's secure with multiple certificates for the clusters.
- Create Key Vault
- Create Service Fabric
- Create Certificate and install into your computer
- Register your certificate into your Service Fabric
- Access Service Fabric Explorer
Create Key Vault
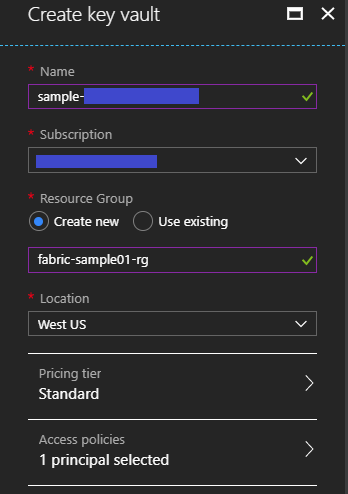
You need to setup a "Key vault" instance like below and it's OK to use existing one if you have already your "Key vault" instance, because Service Fabric depends on Key Vault
Create Service Fabric
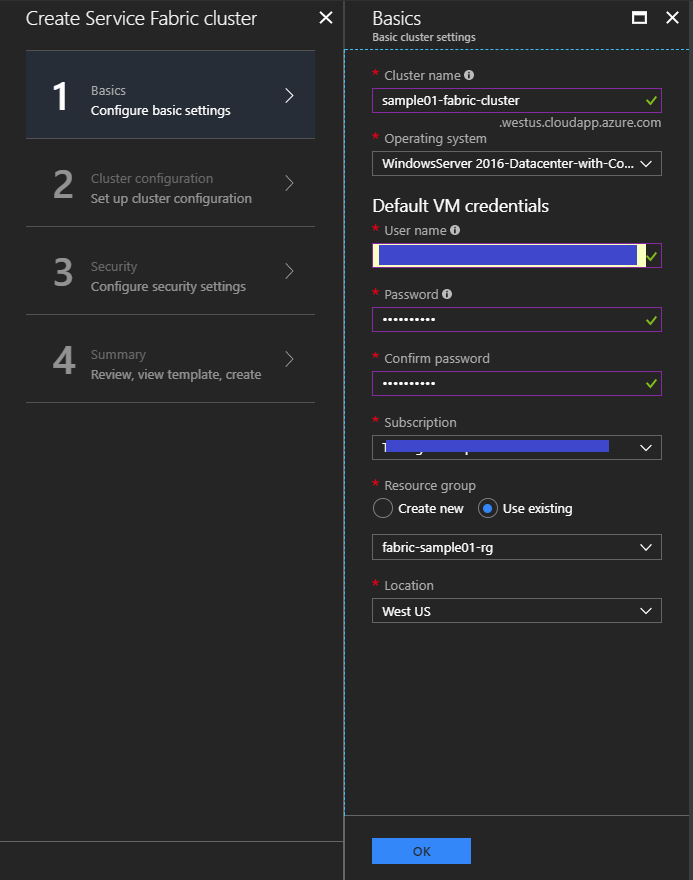
Create your Service Fabric cluster following below steps. You need to choose "Operating system" adjusting to your applications.
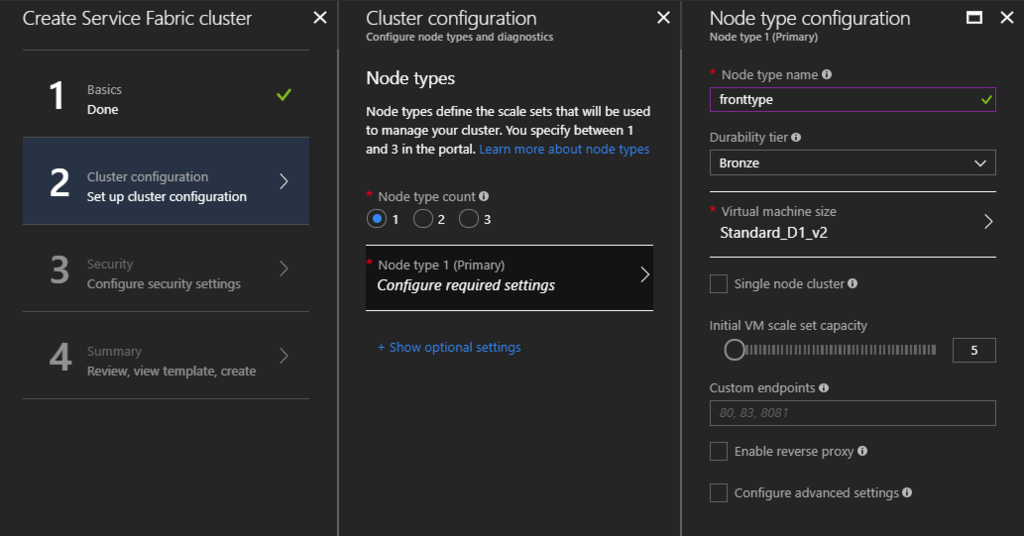
"Node types" is similar with "Cloud Service Roles". VM Scale sets will be created as a number of "Node type count", and specify your "Node type name" and instance type for your "Node Type".
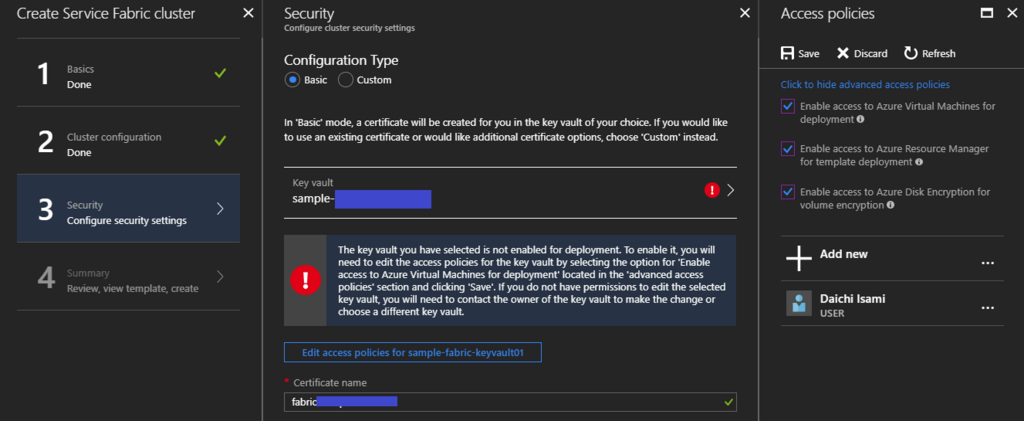
Setup up your cluster security. Please note "Click to hide advanced access policies" at first, and add "Enable access ..." as your Access policies on your Key Vault instance, because it's mandatory to setup. Input your "Certificate name" for your internal cluster communication.
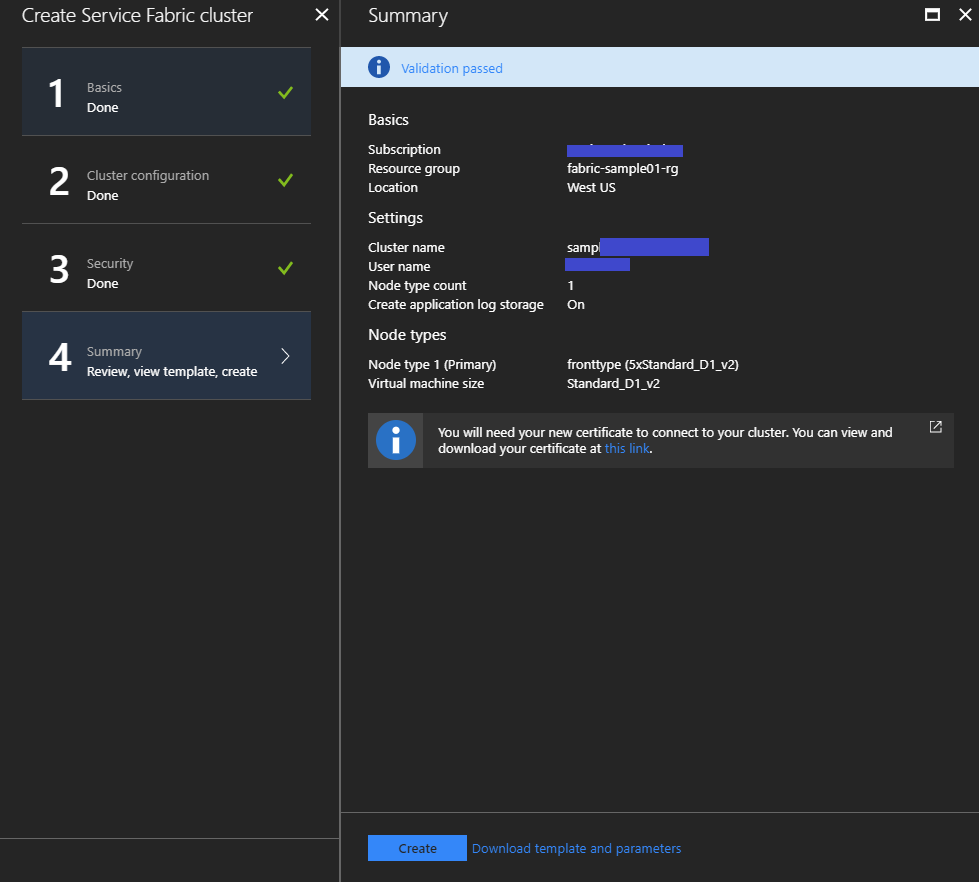
Verify your cluster info and execute to create it.
Create Certificate and install into your computer
You need to create and register new certificate to communicate between your client machine and your cluster. At first, execute below command to create new certificate and you need to input some passwords for the certificates.
# I tried "C:\Program Files (x86)\Windows Kits\10\bin\10.0.16299.0\x64\makecert and PVK2PFX", but its path depends on your computer platform
makecert -sv yourprivatekeyfile.pvk -n "CN=Daichi Isami" yourcertfile.cer -b 02/14/2018 -e 12/31/2020 -r
PVK2PFX -pvk yourprivatekeyfile.pvk -spc yourcertfile.cer -pfx yourpfxfile.pfx -po <your password>
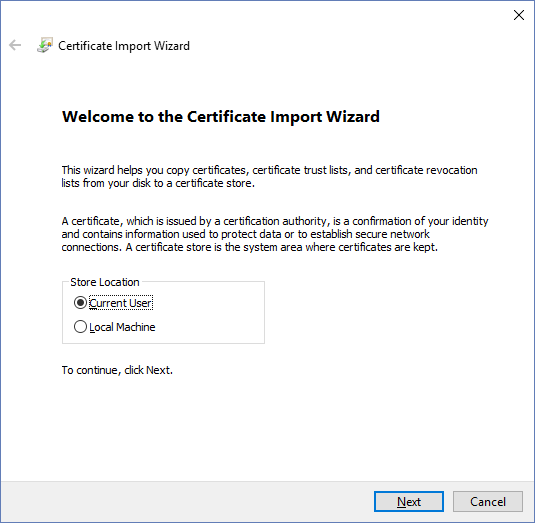
After creating your certificate, just double click it and install certificate into your compute with clicking below button. you need to input password when you create this certificate.
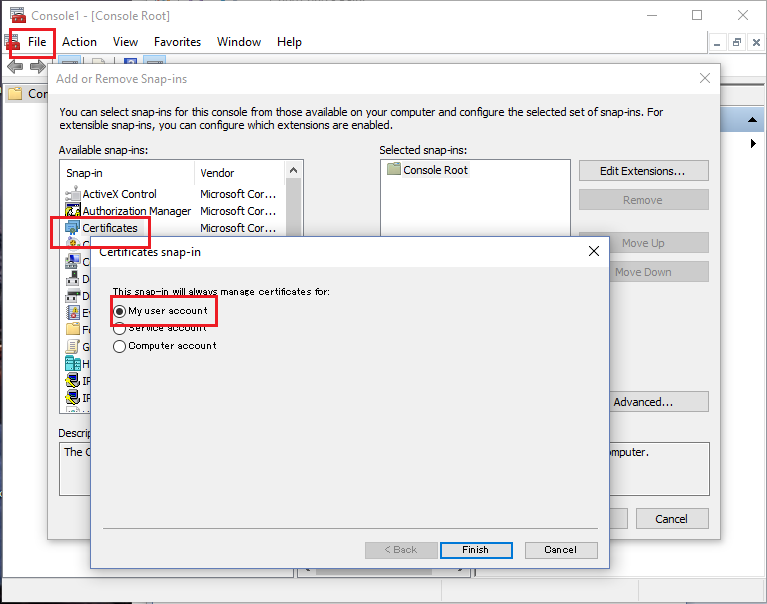
Next, execute "mmc" on PowerShell. Choose "File" -> "Add/Remove Snap-in..." and add "Certificates" as "My user account" like below.
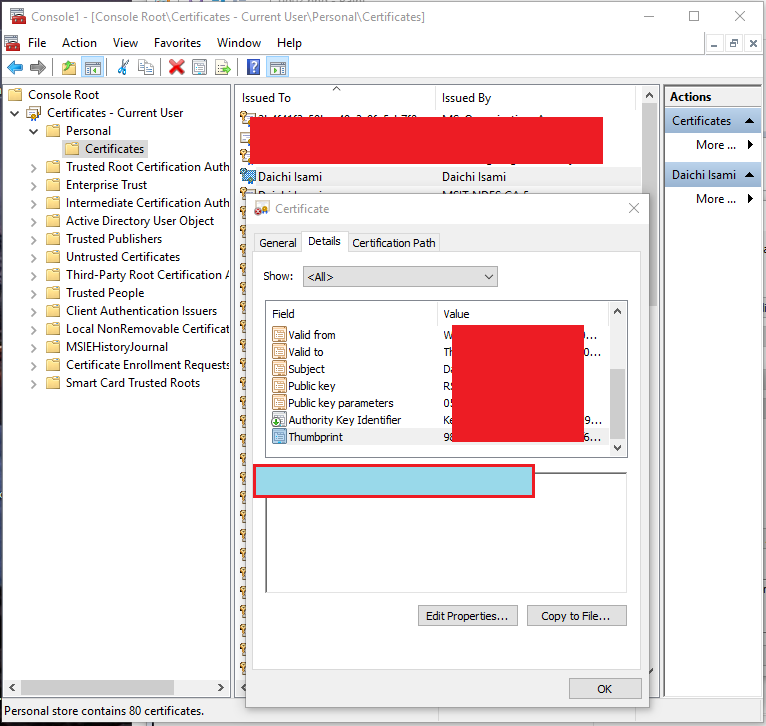
Choose "Certificates - Current User" -> "Personal" in left side and chose your certificate among certificates in central box. Now, you can pick up "Thumbprint" of you certificate like below.
Register your certificate into your Service Fabric
Before proceed this step, you need to confirm your cluster status as "Ready". It might wait more than 20 minute. You might get “failed to submit updates for certificate” error if you proceed this step before that.
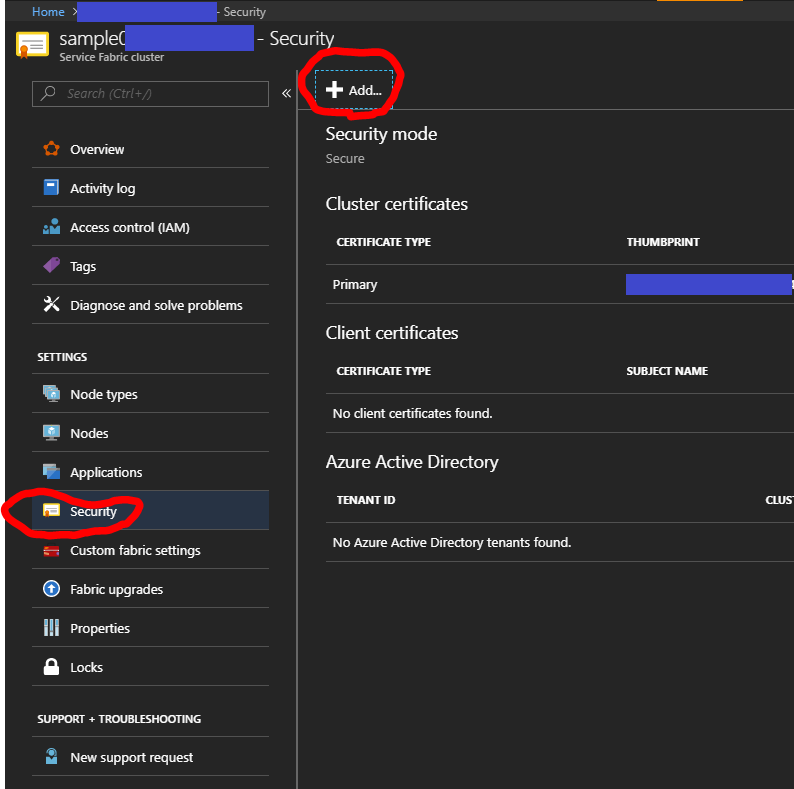
Register your certificate into your Service Fabric cluster in Azure Portal. Choose "Security" tab and "Add.." button.
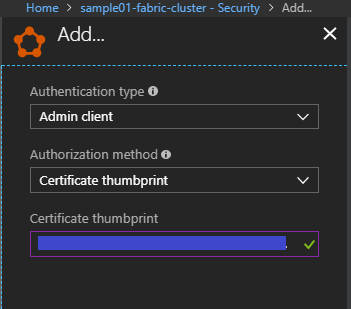
Select "Authentication type" as Admin client to deploy and upgrade your cluster. Input your saved thumbprint into "Certificate thumbprint" and save it.
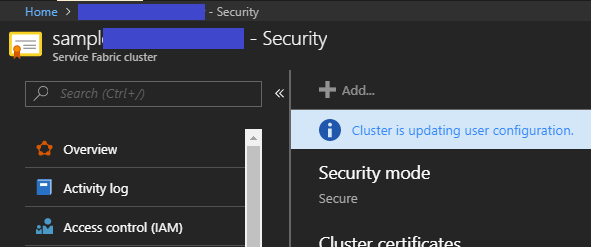
After this, it takes about 30 minutes to complete this step.
Access Service Fabric Explorer
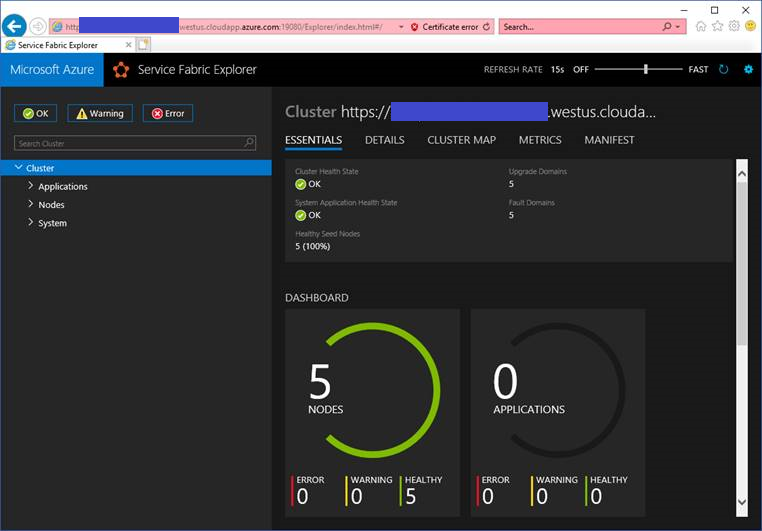
Access Service Fabric Explorer URL like https://"your cluster name"."your region".cloudapp.azure.com:19080/Explorer/index.html#/, and choose proper certificate installed into your compute.
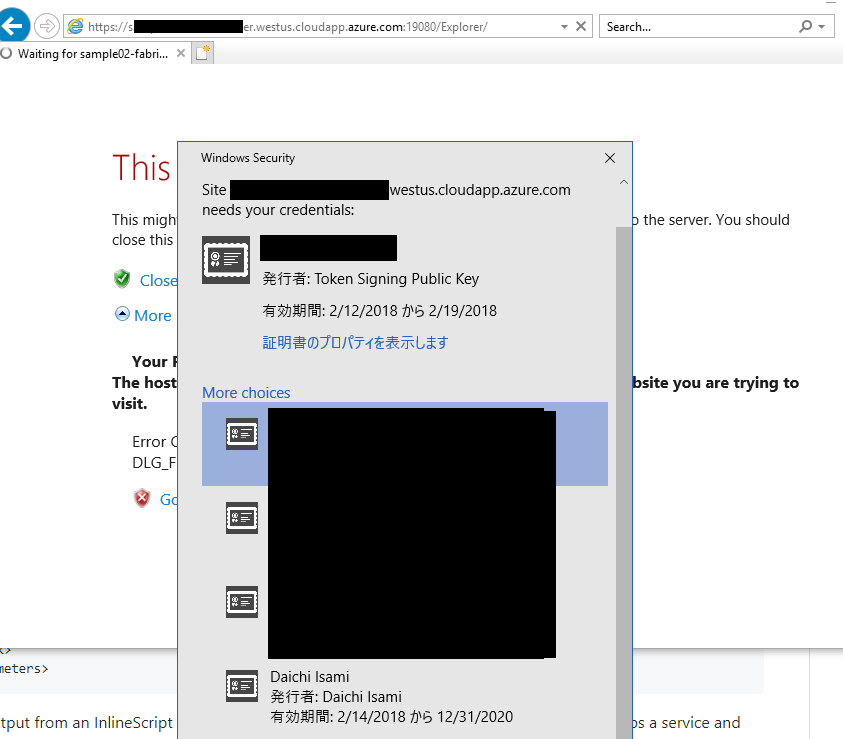
You can watch Service Fabric Explorer on your cluster
References
- How to: Create Your Own Test Certificate
- https://docs.microsoft.com/en-us/azure/service-fabric/service-fabric-connect-to-secure-cluster#connectsecureclustersetupclientcert
- https://docs.microsoft.com/en-us/azure/service-fabric/service-fabric-cluster-security-update-certs-azure
- https://docs.microsoft.com/en-us/azure/service-fabric/service-fabric-visualizing-your-cluster
- https://docs.microsoft.com/en-us/azure/service-fabric/service-fabric-tutorial-deploy-app-to-party-cluster
- https://github.com/uglide/azure-content/blob/master/articles/service-fabric/service-fabric-visualstudio-configure-secure-connections.md
- https://github.com/uglide/azure-content/blob/master/articles/service-fabric/service-fabric-cluster-creation-via-portal.md