How to setup Service Fabric connections on VSTS
Visual Studio Team Service, VSTS, is really powerful tool to achieve your CI/CD pipeline. Before setting up Service Fabric connections, you need to create a *.pfx file to register as "Client Admin" certificate into your Service Fabric cluster. Please refer
Step by step how to setup Service Fabric Explorer on Azure - normalian blog if you have registered no *.pfx files as "Admin Client" certificates yet.
Create BASE64 string from your *.pfx file
Create BASE64 string for registering on VSTS portal to setup Service Fabric cluster connections.
PS C:\Users\normalian> [System.Convert]::ToBase64String([System.IO.File]::ReadAllBytes("D:\temp\yourpfxfile.pfx"))
MIIJ+gIBAzCCCbYGCSqGSIb3DQEHAaCCCacEggmjMIIJnzCCBgAGCSqGSIb3DQEHAaCCBfEEggXtMIIF6TCCBeUGCyqGSIb3DQEMCgECoIIE9jCCBPIwHAYKKoZIh
"omission"
OBBRKwq7BWPo3ZdSGscBgAYKIhP8yGwICB9A=
Pick up and save the BASE64 string.
Setup on VSTS portal
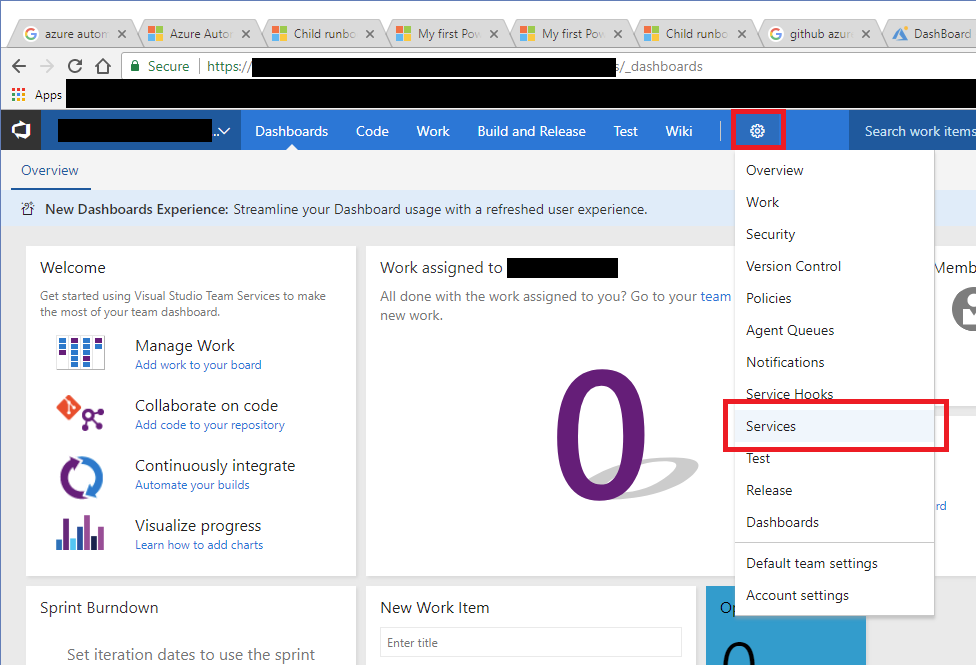
Go to your VSTS project page and choose right side icon and "Services" item like below.

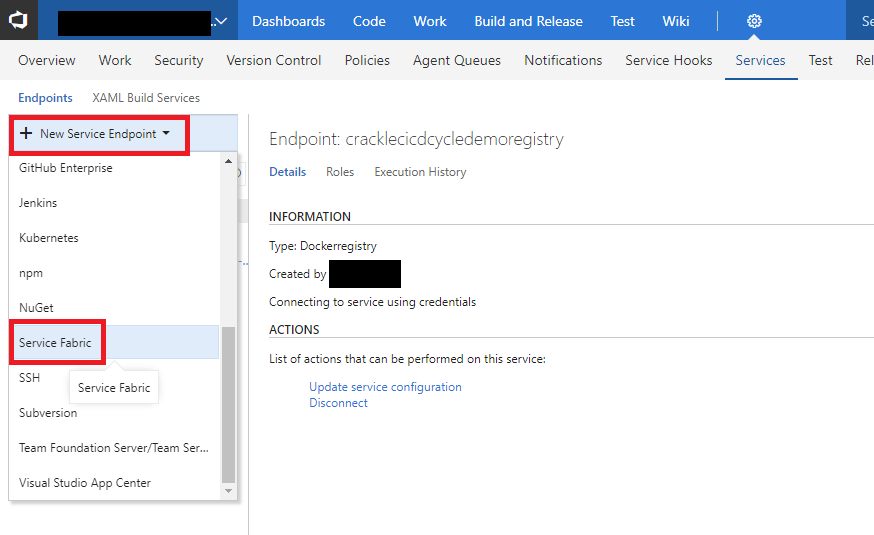
Click "New Service Endpoint" and choose "Service Fabric" like below.

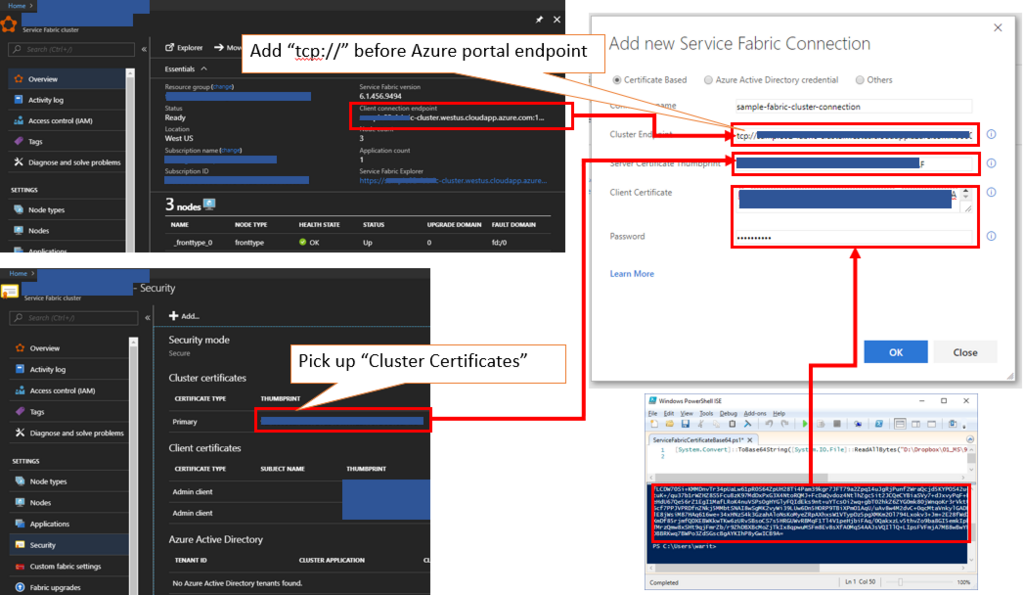
Input your info into "Add new Service Fabric Connection" wizard like below. Input *.pfx file password into "Password" section.

Now, you can use your Service Fabric cluster in your VSTS project.